First of all I am installing two scanners to the machine, why you ask? Well because I have two within reach and too much time on my hands at the moment.
First you need to make sure you are ready for the scanner so drop to a command line and do the following.
sudo apt-get install libsane sane-utils
First is a Mustek BearPaw 1200CU Plus like so.

Go ahead and get a file called PS1Dfw.usb from http://meier-geinitz.de/sane/gt68xx-backend/ and move it to /usr/share/sane/gt68xx/ then sudo chmod a+w it.
Type sudo scanimage -L and you should see something like this...
device `gt68xx:libusb:001:003' is a Mustek Bearpaw 1200 CU Plus flatbed scanner
What you need to know the numbers immediately following gt68xx:libusb:, in my case 000:003 and try to scan the image from the command line.
sudo chmod a+w /dev/bus/usb/001/003
sudo scanimage gt68xx:libusb:001:003 --resolution 300 --format png > ~/test.png
Of course you want to replace the 001:003 with the numbers you got.
The scanner should work now, so if you happen to be have X installed, simply try to scan with your favorite software. If you happen to be at the command line, then you can test it with this the following.
One scanner down, one to go.. If you are just setting up this scanner, read the little bit after I set up the next scanner. It might apply to you.
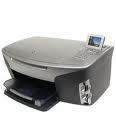
Next is a HP Photosmart 2610 all-in one. (the printer installs just fine with cups and is probably auto-detected and set up for you if using the desktop version.

Install the HP software.
sudo apt-get install hplip
Now to find out where on the USB bus it is...
lsusb
You'll get something like this.
Bus 001 Device 002: ID 03f0:4511 Hewlett-Packard PhotoSmart 2600
You'll need to know the first two numbers 001 and 002 in this case and substitute them into the following command.
sudo hp-makeuri 001:002
Now is time for the actual Scanner Server. The steps I added are in a different font.
sudo su
apt-get install netpbm sane-utils tesseract-ocr-eng apache2
groupadd scanner
adduser www-data scanner
echo 'AddHandler cgi-script .cgi' >> /etc/apache2/apache2.conf
cat /etc/apache2/sites-available/default | sed
's/FollowSymLinksMultiViews/FollowSymLinks MultiViews ExecCGI/g' > /tmp/default
mv /tmp/default /etc/apache2/sites-available/default
/etc/init.d/apache2 restart
cd /var/www
cd /var/www
wget http://scannerserver.online02.com/download/scan_1.1.9.tar
tar -xvvf scan_*.tar
rm scan_*.tar
chmod a+w /dev/bus/usb/001:002
exit
Now that the Server is up, just open a page to the machine running the server like this..
http://SomeWhereOnMyLAN/scan
If all went well you are almost done, just one more thing...
Now that the scanner is installed and working, you will need (at least I did) to make the chmod a+w /dev/bus/..... permanent. To do this I modified /etc/rc.local to include the two chmod lines I issued to make them work.
chmod a+w /dev/bus/usb/001/003
chmod a+w /dev/bus/usb/001/002
No comments:
Post a Comment