Wednesday, December 15, 2010

Using apt-fast to speed up Ubuntu installs

When setting up your Ubuntu system and installing lots of programs, you might want to consider using this really neat utility called apt-fast. It gets your download from multiple sources to increase your download speed and therefore speed up the install process, best of all it supports the upgrade and dist-upgrade options!


Using Ubuntu, just drop to a command line and do the following...

sudo add-apt-repository ppa:tldm217/tahutek.net
sudo apt-get update
sudo apt-get install apt-fast

Now when you install just use apt-fast instead of apt-get and you should see a big improvement.


Scott


Friday, December 10, 2010

I just set up my netbook with 10.10 server edition, LXDE and cairo-dock, all I had to do to make it just right for me was remove lxpanel and pcmanfm. Now I have a nice clean desktop without all the extra crap installed I will never need. The only thing missing was a wallpaper changer, so I threw together a little script to display a random one. Be sure you have FEH installed and are not using pcmanfm to manage your desktop. Just save it somewhere, chmod +x it, and add it to ~/.bashrc (I start a terminal at login) with a & at the end of the line and you are good to go.


#change wallpaper randomly
#by scott goodgame 2010

#! /bin/bash
WALLPAPER_DIRECTORY=~/DesktopStuff/wallpaper
INTERVAL=300 # number of seconds to keep each wallpaper
FILES=($WALLPAPER_DIRECTORY/*)

while true; do
feh --bg-fill ${FILES[RANDOM%${#FILES[@]} ]}
sleep $INTERVAL
done

Irvverter in Ubuntu 10.10 Meerkat

My favorite conversion software for my ematic mp3/video player, iriverter, dosent work when installed from the repository. Here is how to install it..

Go to http://iriverter.thestaticvoid.com/ and download the latest version.

Drop to a command prompt and change to the directory you downloaded it to, then type sudo /usr/lib/jvm/java-6-openjdk/bin/javaws iriverter.jnlp

Enjoy

Scott

Saturday, October 23, 2010

Adding a Bearpaw 1200 CU Plus scanner to Ubuntu Lucid Lynx Netbook Remix

I sometimes take my old scanner with me on the road and needed to add it to my Ubuntu installation so here is a quick rundown of what I did, as much for me as for you.
First head over to http://www.meier-geinitz.de/sane/gt68xx-backend/ and get a file called PS1Dfw.usb.

Drop to a shell, cd to the directory you downloaded it to and issue the following commands...

sudo cp PS1Dfw.usb /usr/share/sane/gt68xx/
sudo chown root /usr/share/sane/gt68xx/PS1Dfw.usb
sudo chmod 755 /usr/share/sane/gt68xx/PS1Dfw.usb

Now the scanner should be just fine.


Friday, August 13, 2010

Still adding to the server... Using Mimms to Record MMS Audio Streams in Ubuntu Lucid 10.04

I like to listen to a couple radio shows that stream on the internet, so I am putting all that unused power in my little'ol server to use. I tried to use Mplayer and VLC to record streams, but they seemed too sensitive to connection issues for my taste, so I decided on something made just for the purpose. Mimms. After recording and converting the file to mp3, I save it to a couple of places, like my Dropbox... Now I don't have to remember to sync the player before work.

Mimms is in the repos, but it needs python 2.5 and that isn't, so you need to drop to the command line and do the following
  • sudo nano /etc/apt/sources.list
  • add the following to the end of the file
deb http://ppa.launchpad.net/fkrull/deadsnakes/ubuntu lucid main
deb-src http://ppa.launchpad.net/fkrull/deadsnakes/ubuntu lucid main
  • press O to save (thats the letter)
  • press X to exit
  • Now get the packages with the following
sudo apt-get mimms python25

Now here is an example of my script I use to record a radio show:

#record an audio mms stream and convert it to mp3
#then copy them to a network share, then move them to my Dropbox
#Scott Goodgame 2010
#
#!/bin/sh
TIMESTAMP=$(date +”%b-%d-%y”)


#(use mimms to record the show for 243 minutes)
mimms -t 243 "mms://AStreamNameGoesHere" /home/jack/radio-to-radio-$TIMESTAMP


#convert asf to wav and then from wav to mp3 (if anybody has a better way to do this, let me know!)
mplayer /home/jack/radio-to-radio-$TIMESTAMP -ao pcm:file=/home/jack/radio-to-radio-$TIMESTAMP.wav
lame /home/jack/radio-to-radio-$TIMESTAMP.wav /home/jack/radio-to-radio-$TIMESTAMP.mp3
#copy the file to the network share, move it to a daily directory and move it to my dropbox, then clean up the mess
cp radio-to-radio-$TIMESTAMP.mp3 /home/jack/Dropbox
cp radio-to-radio-$TIMESTAMP.mp3 /media/other/Audio/Today
mv radio-to-radio-$TIMESTAMP.mp3 /media/other/Audio/Podcasts/radio


rm /home/jack/radio-to-radio-$TIMESTAMP
rm /home/jack/radio-to-radio-$TIMESTAMP.wav


Now, just paste that into a file, put a stream in the mimms line and edit the time on the same line.

My particular show plays every night, so I made it a cron job to run every night- here is the relevant line from my crontab:

# m h dom mon dow command
57 00 * * * /home/jack/bin/record-raido-show

My show starts at 1am, but I start the job early because sometimes it takes a few seconds for mimms to connect and I don't like to miss anything.

I was going to tell you about editing the crontab file, but why reinvent the wheel? Here is a really nice link to get you started....

http://ubuntuforums.org/showthread.php?t=102626

Happy recording!

Scott

A Scanner Server for the, uhm, Server...


I went to http://scannerserver.online02.com/node/12 to find out how to add a scanner server to my setup, and the directions worked perfectly (almost) I had to add two steps to the setup for it to work on my Ubuntu Lucid 10.04 Server setup, so I am going to mirror his steps and just add my little bit. I have no idea if this situation was caused by an Ubuntu thing, my dumb mistake or some minor oversight in the directions, but either way here we go...

First of all I am installing two scanners to the machine, why you ask? Well because I have two within reach and too much time on my hands at the moment.

First you need to make sure you are ready for the scanner so drop to a command line and do the following.

sudo apt-get install libsane sane-utils

First is a Mustek BearPaw 1200CU Plus like so.


Go ahead and get a file called PS1Dfw.usb from http://meier-geinitz.de/sane/gt68xx-backend/ and move it to /usr/share/sane/gt68xx/ then sudo chmod a+w it.


Type sudo scanimage -L and you should see something like this...

device `gt68xx:libusb:001:003' is a Mustek Bearpaw 1200 CU Plus flatbed scanner

What you need to know the numbers immediately following gt68xx:libusb:, in my case 000:003 and try to scan the image from the command line.

sudo chmod a+w /dev/bus/usb/001/003
sudo scanimage gt68xx:libusb:001:003 --resolution 300 --format png > ~/test.png

Of course you want to replace the 001:003 with the numbers you got.

The scanner should work now, so if you happen to be have X installed, simply try to scan with your favorite software. If you happen to be at the command line, then you can test it with this the following.


One scanner down, one to go.. If you are just setting up this scanner, read the little bit after I set up the next scanner. It might apply to you.

Next is a HP Photosmart 2610 all-in one. (the printer installs just fine with cups and is probably auto-detected and set up for you if using the desktop version.
Install the HP software.

sudo apt-get install hplip

Now to find out where on the USB bus it is...

lsusb

You'll get something like this.

Bus 001 Device 002: ID 03f0:4511 Hewlett-Packard PhotoSmart 2600

You'll need to know the first two numbers 001 and 002 in this case and substitute them into the following command.

sudo hp-makeuri 001:002

Now is time for the actual Scanner Server. The steps I added are in a different font.
sudo su

apt-get install netpbm sane-utils tesseract-ocr-eng apache2

groupadd scanner

adduser www-data scanner

echo 'AddHandler cgi-script .cgi' >> /etc/apache2/apache2.conf

cat /etc/apache2/sites-available/default | sed
's/FollowSymLinksMultiViews/FollowSymLinks MultiViews ExecCGI/g' > /tmp/default

mv /tmp/default /etc/apache2/sites-available/default

/etc/init.d/apache2 restart

cd /var/www

wget http://scannerserver.online02.com/download/scan_1.1.9.tar

tar -xvvf scan_*.tar

rm scan_*.tar
chmod a+w /dev/bus/usb/001:002
exit


Now that the Server is up, just open a page to the machine running the server like this..
http://SomeWhereOnMyLAN/scan

If all went well you are almost done, just one more thing...

Now that the scanner is installed and working, you will need (at least I did) to make the chmod a+w /dev/bus/..... permanent. To do this I modified /etc/rc.local to include the two chmod lines I issued to make them work.

chmod a+w /dev/bus/usb/001/003
chmod a+w /dev/bus/usb/001/002


Sunday, July 25, 2010

Speeding up Lucid Server Setup with Webmin


I don't mind setting everything up by hand, but this can be error prone and slow. Webmin is a neat program with a web based interface that makes it quick and easy to set up mounts and shares, among other things. These are the the directions for Ubuntu Server Lucid.
Lets just cut to the chase....

sudo aptitude -y install perl libnet-ssleay-perl openssl libauthen-pam-perl libpam-runtime libio-pty-perl libmd5-perl apt-show-versions libapt-pkg-perl

(it'll give you an error about libmd5-perl, don't worry about it)

wget http://ftp.debian.org/pool/main/libm/libmd5-perl/libmd5-perl_2.03-1_all.deb
sudo dpkg -i libmd5-perl_2.03-1_all.deb
wget http://downloads.sourceforge.net/project/webadmin/webmin/1.510/webmin_1.510-2_all.deb?use_mirror=cdnetworks-us-1
sudo dpkg -i webmin_1.510-2_all.deb

Now you should be able to point a browser over to http://ipaddress and begin configuring.


Saturday, July 24, 2010

There's a new (Ubuntu 10.04 Lucid) server in town.


I recently acquired an old, but mostly functional laptop (broken screen, missing keys, etc....) that I thought would make a nice home server, after all I like to make use of the tech I have on hand and this frees up my desktop & netbook for other stuff.. like Starcraft and XBMC. Here are some of the functions I have in mind.
  • File Server
  • Media Server for my Netgear MP-101 and possibly web-clients.
  • Print Server
  • Scanner Server
  • Torrent machine
  • Radio Stream recorder
  • Radio Shark Recorder
  • Bashpodder Client
The Machine itself isn't so bad, it's a Compaq Presario with 512MB, 80GB and an Athlon XP Processor 2000+ (1.67GhzsoI don't foresee anything really taxing on the machine, especially without a GUI running. Once it is installed, I'll be configuring it through SSH and Web Clients. I chose Ubuntu Server 10.04 Lucid Lynx for the project because I am familiar with the Ubuntu line, is Debian based, has great repositories and support, and it is a LTS release.

The install was uneventful, I just was sure I selected Lamp Server, OpenSSH Server, Print Server and Samba File Server from the list and let it do it's thing.

The first thing I did after the install was to change the IP address from dynamic to static like so.

sudo nano /etc/network/interfaces
put a # in front of the line that says iface eth0 inet dhcp and add the following lines after it
iface eth0 inet static
address 192.168.0.2
netmask 255.255.0.0
network 192.168.0.0
broadcast 192.168.0.255
gateway 192.168.0.1

You are of course going to have to fiddle with the numbers to reflect your own network.
hit ctl-o and ctl-x to save and exit. (if you used nano)
now you can restart networking by
sudo /etc/init.d/networking restart

You can check your settings by issuing ifconfig eth0

Next it's time to update all those packages that have changed since the cd was finialized.
sudo apt-get update && sudo apt-get upgrade

Finally I install a couple of packages that are really useful to have, but don't really need a whole blog post.
sudo apt-get install sendemail curl weather figlet links2

Thats it for now.. next post I'll be installing Webmin to speed up the setup process.

Tuesday, July 20, 2010


Along with sending my phone SMS messages I find it useful to have my server twitter me when something noteworthy happens. If you want to do this from the command line easily, just do this.

sudo apt-get install curl

nano ~/bin/filename

curl --basic --user "yourusername:yourpasswd" --data-ascii "status=`echo $@|tr ' ' '+'`" "http://twitter.com/statuses/update.json" -o /dev/null
echo Message Sent!

save it with -o
exit with -x
give it execute permission chmod +x ~/bin/filename

use it like so filename "message"

That was easy!


Acer Revo+XBMC+Remote Control = Warm Squishy Goodness


The Acer Revo was just made for XBMC, it is small, compact easily hidden and can play HD content with ease. Assuming you already are running Ubuntu Lucid Lynx it dosen't take much to get XBMC up and running.
Drop to a terminal Applications->Accesories->Terminal (in Gnome)
sudo apt-get install ubuntu-restricted-extras
(in case you haven't done it already)

sudo apt-get install libvdpau1
(in case you haven't done it already)
sudo add-apt-repository ppa:team-xbmc
sudo apt-get update
sudo apt-get install xbmc xbmc-standalone
sudo apt-get update

If you want to play DVD's
sudo wget --output-document=/etc/apt/sources.list.d/medibuntu.list http://www.medibuntu.org/sources.list.d/$(lsb_release -cs).list && sudo apt-get --quiet update && sudo apt-get --yes --quiet --allow-unauthenticated install medibuntu-keyring && sudo apt-get --quiet update

sudo apt-get install libdvdcss2

If you have an IR remote...
sudo apt-get install gnome-lirc-properties
I really can't tell you much about configuring it because I bought this cheap one from amazon.com, went to System->Preferences->Infrared Remote Control and let it autodetect and it 'just worked' here is a link in case you are interested...
http://www.amazon.com/Wireless-USB-Remote-Control-Mouse/dp/B001M56DI0/ref=sr_1_2?ie=UTF8&s=electronics&qid=1279606854&sr=8-2

Ubuntu Lucid+Acer Revo+ All the 'fixins


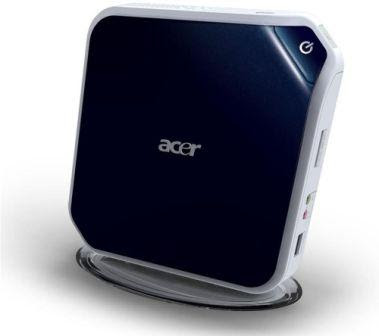
I Love my Acer Revo 1610! (the 3600 is dual core) The Nvidia ION makes video playback smooth as can be. Since Lucid recently came out, I decided to just do a clean install and actually document it this time. This little guide is by no means meant to be all comprehensive, just a little guide of some of the stuff I did when installing.I hope this is of use to someone.

Download the .iso from www.ubuntu.com and burn it if you have an external drive, if not just dig up a 1GB flash drive and head over to www.pendrivelinux.com to make a bootable flash drive.
boot and install Ubuntu.

After installation and booting, an icon should appear on the upper panel to the right of the screen, then it asks you if you want to use the proprietary drivers. Yes you do. If you are using HDMI cable, you might not hear anything - to fix it go to System->Preferences->Sound->Hardware tab and select Digital Stereo (HDMI) Output + Analog Stereo Input from the drop down, then click close.

If you have an LCD monitor, be sure sub-pixel smoothing is turned on by going to System->Preferences->Appearance-> and the Fonts tab.

Click System -> Administration -> Software Sources (password required) -> Other Software -> put a check mark next to http://archive.canonical.com/ubuntu lucid partner.This lets you get everything from the repository.

Since I am behind a router and use occasionally need it, I changed my IP configuration from DHCP to static. (note: you don't wan't to do this if you are on dial up or are directly connected to a cable modem) If you don't need it, don't do it.
sudo nano /etc/network/interfaces
If you are using DHCP you will see the following...
auto eth0
iface eth0 inet dhcp

Just put a # in front of the 'iface eth0 inet dhcp' line and add the following lines, adjusting for your individual situation
iface eth0 inet static
address 192.168.1.100
netmask 255.255.255.0
network 192.168.1.0
broadcast 192.168.1.255
gateway 192.168.1.1


Now we can install a bunch patches that have been issued since the cd was finialized and a library to help with video playback. ION specific. If you don't have an ION, you prpbably don't need it.

Go to Applications -> Accessories -> Terminal and enter the following commands (or just cut and paste)


sudo apt-get update
sudo apt-get upgrade
sudo apt-get install libvdpau1

Update your video drivers...
sudo apt-get update && sudo apt-get install nvidia-195-modaliases nvidia-glx-195


Install the restricted extras to get for audio/video codecs media playback
sudo apt-get install ubuntu-restricted-extras

Add the Medibuntu repository.

sudo wget --output-document=/etc/apt/sources.list.d/medibuntu.list http://www.medibuntu.org/sources.list.d/$(lsb_release -cs).list && sudo apt-get --quiet update && sudo apt-get --yes --quiet --allow-unauthenticated install medibuntu-keyring && sudo apt-get --quiet update

Now we can download a library to decode encrypted DVD's for playback. (you want this)

sudo apt-get install libdvdcss2

Now you are ready to install the other applications you want from the Ubuntu Software Center. I recommend Skype, Alien Arena, Wine (so you can run some windows programs) VirtualBox (you can install an entire OS 'inside' Ubuntu), Samba (for filesharing on the network), Foomatic (to ease printer installs) look around, you'll find all kinds of goodies. (don't install VLC just yet.. read on)

There are also many apps not in the repositories you might want to have....

VLC is my favorite all around media player (I'll do XBMC soon...) but the version in the repository is outdated, do the following to get the latest version. (if you already installed it from the Ubuntu Sortware Center, remove it first)
sudo add-apt-repository ppa:c-korn/vlc && sudo apt-get update
sudo apt-get install vlc


Google Chrome is my favorite browser, fast and you can set up bookmark sync across other computers if you have a gmail account. The following command will install it and add it to the update list so it will stay current.
sudo apt-get update
sudo apt-get install google-chrome-beta

Google earth is a favorite time-waster of mine and if you have added the Medibuntu repository (see above) it's a snap to get.
sudo apt-get install googleearth googleearth-data
Dropbox is just cool to have, you set it up and you have a folder that you can save stuff to and it syncs to other computers you have it installed on. Very useful for work and school, you'll never be without that document again. Don't have dropbox on the computer you are sitting at? Just head over to dropbox.com, login and you can download your files through the browser. Slick.
Get it at www.dropbox.com

Ubuntu Tweak lets you change all kinds of settings easily, I highly recommend it.
sudo add-apt-repository ppa:tualatrix/ppa
sudo apt-get update
sudo apt-get install ubuntu-tweak


The repository has some pretty good games, but if you yearn for more download this and run it
http://archive.getdeb.net/install_deb/playdeb_0.3-1~getdeb1_all.deb
then go to http://www.playdeb.net/updates/#how_to_install, find a game and click to install.
There is a great guide put out by the Ubuntu people themselves, give it a look
http://ubuntuguide.org/wiki/Ubuntu:Lucid

Monday, July 19, 2010

I'm Back after a long hiatus

I've been very busy lately and haven't kept up, but I have a whole list of stuff that will be in the comming weeks.